Well, Everyone’s saying ‘I want to start a blog’. But, Why only dream about creating a blog? Let me guide how to easily start a blog.
As you will go ahead in this article, I want you to read What is Blogging? Types? Importance? because it contains basic information about what exactly is blogging.
Before creating a blog, let’s focus on some important aspects:
#1 Find Purpose
The first and foremost question you’ve to ask yourself. Why I should start (create) a blog?
Most of the bloggers fail to THINK THEIR PURPOSE.
You should be asking yourself these questions:
1. Which Hobby I would like to turn into writing?
2. What type of skills I would like to showcase to my target audience?
3. Or you want to start your own blog for Fashion, Music, Travel, Food, Fitness blog, etc.
For eg: My Mentor Deepak Kanakaraju, is an expert in Digital marketing and created a brand Digital Deepak over time with his Purpose to create 100,000 digital marketing experts from India.
Or Let’s say I am a Traveler who travels all-a-round the world.
So, as I travel to new destinations, places or countries. I will share images, videos, Information with my audience. It will not only create an identity mine as a Travel Blogger.
#2 Proper Writing skills
The next thing is to make yourself proper in Writing skills i.e. Grammar, Interpersonal skills, communication skills, etc. You might be thinking, Hey do I need such skills? Well, the answer is when you’ll communicate with your audience, the Visitors should be able to understand what you want to convey.
Improving Interpersonal and Writing skills will make you effective in Blogging.
Because blogging is all about writing 🙂
Okay, So Finding purpose & Improving writing skills is what you know until now.
Let’s now dive into actually ‘How to Create a Blog’.
There are basically 2 ways to CREATE A BLOG.
In this guide we will look at the FREE guide:
FREE Blog for you!
Well, who doesn’t love free stuff? And especially starting a blog for free? Sounds awesome.
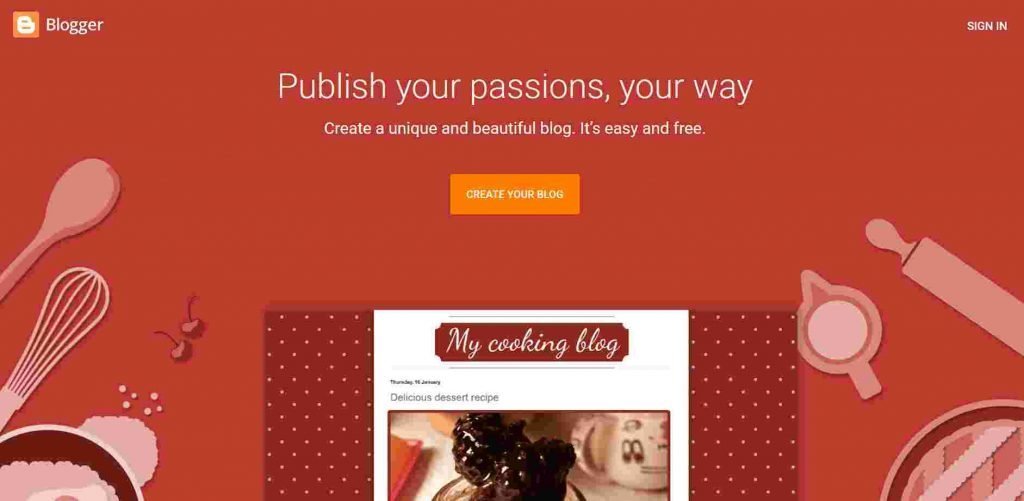
To create your blog for free there is a Platform named Blogger.
Blogger is a free blogging platform for everyone. Whether you’re a student or a retired it doesn’t matter. Blogger lets you create a free blog and publish your own content without any fees.

Blogger is a self-hosted platform by Google. Google provides ‘Blogger‘ as a free method of blogging.
In Blogger, you will be allowed to edit the subdomain domain name or buy a custom one.
In Blogger, you will not get your own domain.
For eg: I run a business named XYZ, so I decide my website should be ‘www.XYZ.com’. But it’s not the case, Blogger will provide you domain such as ‘xyz.blogspot.com’.
In blogger, you cannot expect an Original TLD (Top level domain), for eg: www.xyz.com.
But still, it’s FREE for you now to kickstart your blog. So, let’s take advantage of FREE Blogging. Follow the given steps to quickly set up your blog.
Steps for creating your FREE blog on Blogger
Visit Blogger.com and click on ‘Create Your Blog‘.
After, sign in with your Gmail ID, as a result, it will ask you to enter your ‘Blogger profile’.
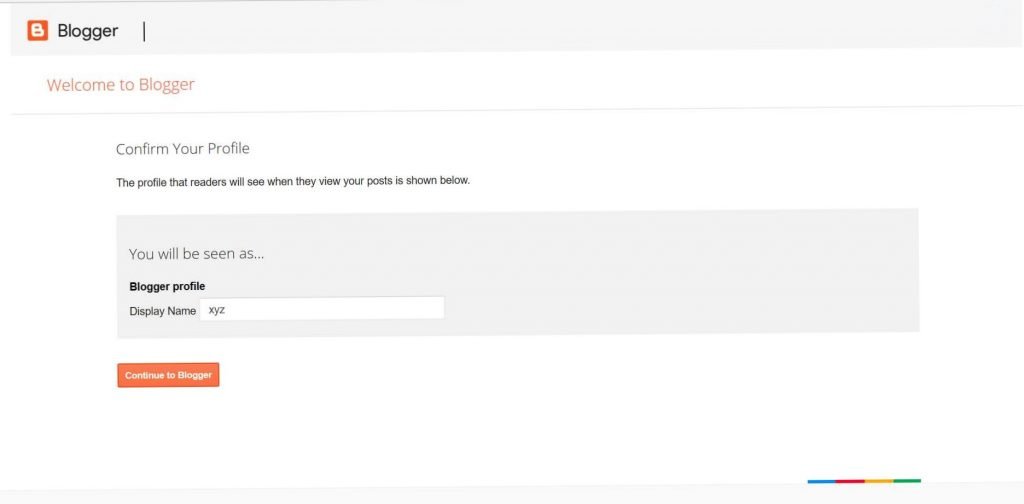
Enter your display name and Continue to blogger.
Hence, you’ll be seeing your Homepage and then click on Create New Blog.
As you will be prompted to give your blog a Unique domain with ‘.blogspot.com’.
Choose any theme of your choice you would like to apply to your blog. Make sure your theme should be matching to your blog category.
For eg: If your blog is about Food it should contain some food items background.
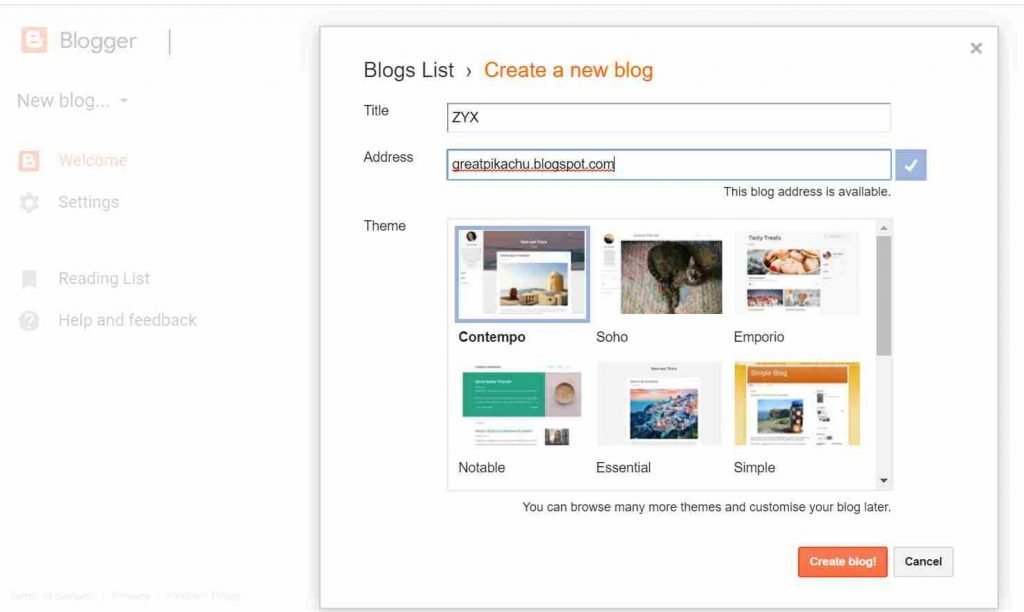
If you still wish to change your title, domain, and other settings later, You can always Go to your domain – Settings – Basic to change the domain for your blog.
Congratulations! Now you’re now online worldwide and ready to Publish your first Blog post 🙂
Congratulations! Your blog is accessed by the whole world. Enter your own blog domain in the URL of any browser to check how your blog looks.
Now you are ready to Write your own Hobby or share your lifestyle with others through blogging.
Next, you will be prompted to ‘Create a New Post‘ on the Blogger homepage.
Click on it and you are ready to write your own Blog related content and Publish it.

After completing your blog post and playing with some text format, you are ready to hit that Publish Button.
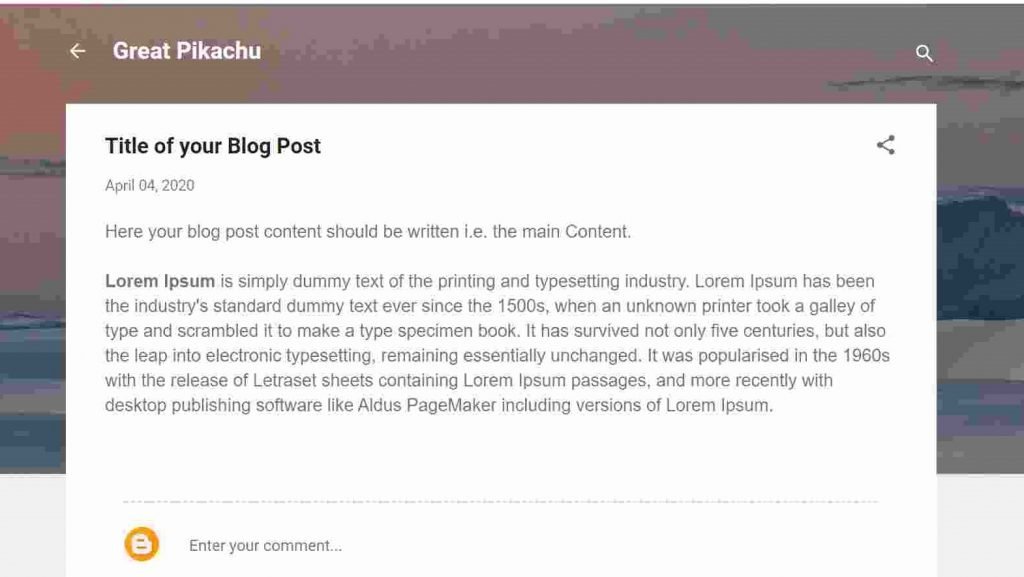
Yayy!! Great Work. You had just published your first blog post.
Share it with your friends and family for some traffic.
But wait, there are some more Integrations are remaining. Whenever you will be writing new blog posts and uploading it.
As a result, you will be in need to check From Where most of the users are coming to your blog? How they’re interacting with your site? After how much time they are leaving your blog?
Well, you need to Integrate (Connect) your blog to Google Analytics.
Setting up your Google Analytics Tracking
What is Google Analytics?
Google Analytics also called GA is a FREE tool provided by Google to let you know who is visiting your blog, what are they doing?
Most importantly, it provides you How many visitors on which page are they. Sounds Awesome, right?
First, visit Google Analytics and sign in with the same Gmail ID you created your Blogger account.
You’ll need to click on a Button ‘Start Measuring‘ in GA. While you will be redirected to Enter your details for the creation of the GA account.
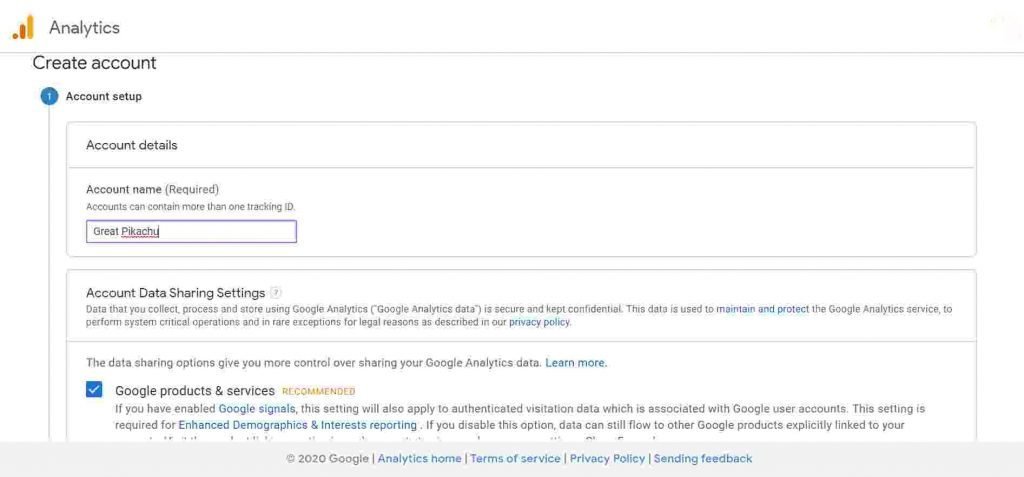
Enter your Account name as same as you entered your Title in Blogger. Also, make the below boxes tick to allow google to constantly provide relevant Support and Data encryption and click on Next.
Now, you will select the option as ‘Web’ to Measure your website to Understand where your users are coming from and turn data into insights.
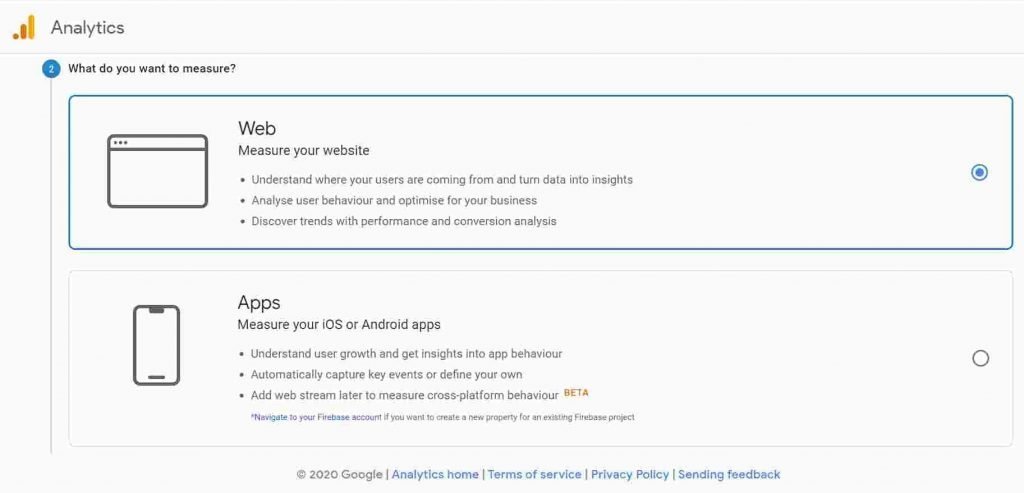
After selecting the option as Web, click Next to proceed.
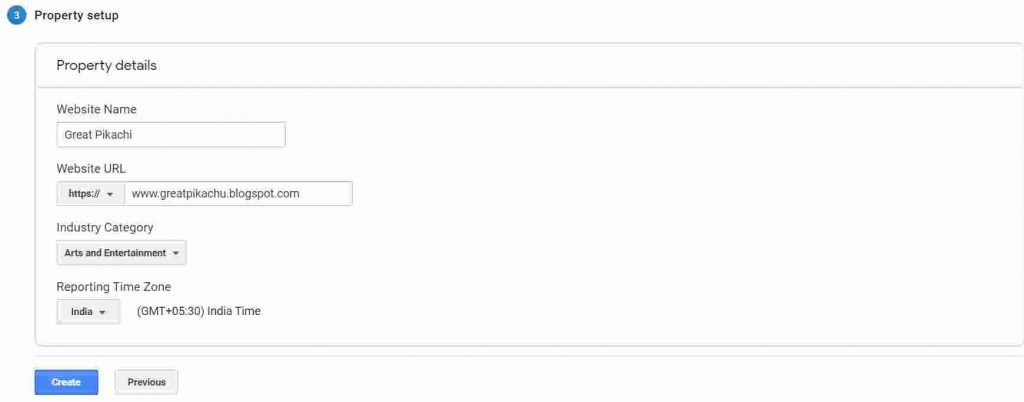
Now GA will ask you to Enter your property details. It includes Website name, Blog URL, your blog category (Food, Travel, Arts, etc), and Reporting time.
Make sure you enter your site name as you entered in blogger account. Also, make sure the URL is ‘https://‘, and choose the relevant industry category.
For eg: I sell handmade shoes, I will enter my Website name as in blogger, Site URL as I registered in Blogger (www.shoesbyharish.blogspot.com), industry category as Shopping, and our own Time zone (India, USA, etc).
Proceed to click Next.
Again, select your country and tick the shown Boxes and Save.
After saving, Google Analytics is Setup and now we are moving to Link GA to your blog.
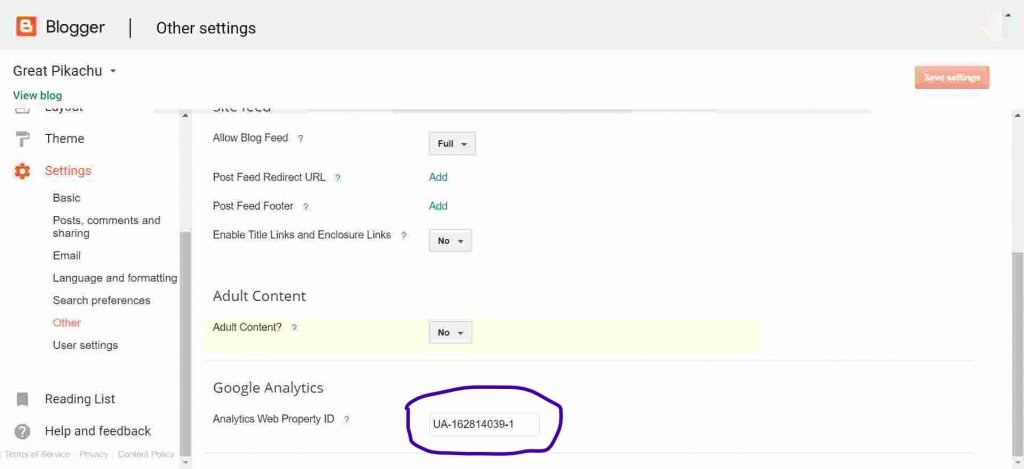
Now, Visit Admin at the very bottom of the GA and Serch for Property in it.
In Property, you have to click on Tracking Code and you will see a Tracking ID (UA-XXXXXXXX-X) there.
Copy Tracking ID and log in to your Blogger ID.
Go to your Blogger Settings – Other – Search for Google Analytics and Paste the Tracking ID in the given box. And click on Save Settings in Top right corner.
Hurray! Google Analytics is successfully linked to your Blog 🙂
Now, open the GA homepage and simultaneously open your previously written blog post in another Tab. And finally, you will be able to see that Google analytics is showing the Number of active users as 1.
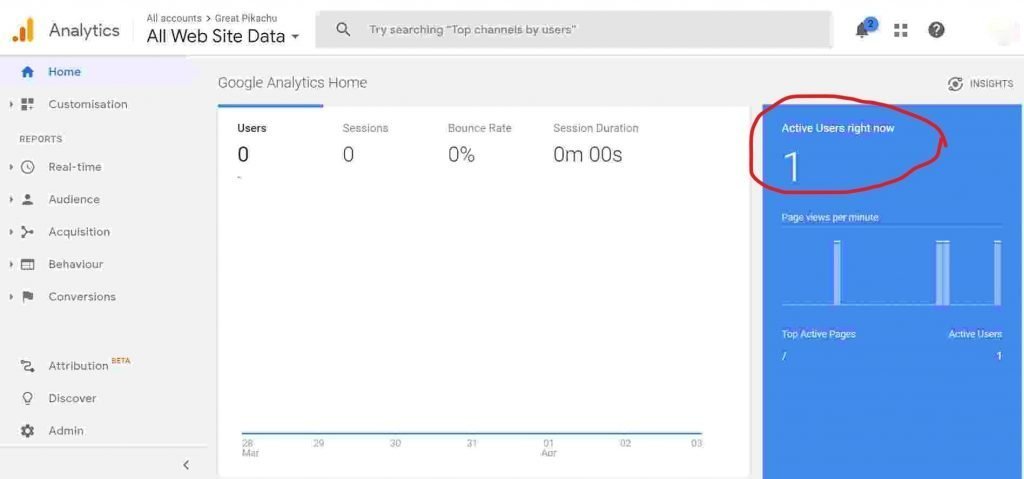
Seems magic, right? Yeah, This is how you can track how many visitors or people are coming to your site.
Not only this, there’s a lot more in Google Analytics, If I say a lot I really mean a Lot. It’s like a Personal Secretary between you and your blog which keeps you updated on what’s happening on your Blog.
Linking Blog to Google Search Console (GSC)
Finally, we reached the last setup of your Blog. Now, you’ll be learning how to Link your blog to a Google search console also called Webmaster Tools.
What is Google search console/Webmaster tools?
Google Search Console tools and reports help you measure your site’s Search traffic and performance, fix issues, and make your site shine in Google Search results.
It basically let you know the insights about how your blog is performing in Search results. It is kinda Doctor of your blog to let you know What’s wrong? or What you should improve on it?
So, let’s move ahead to Link your Blogger A/c to GSC. Follow the given below steps to easily integrate GSC for your blog:
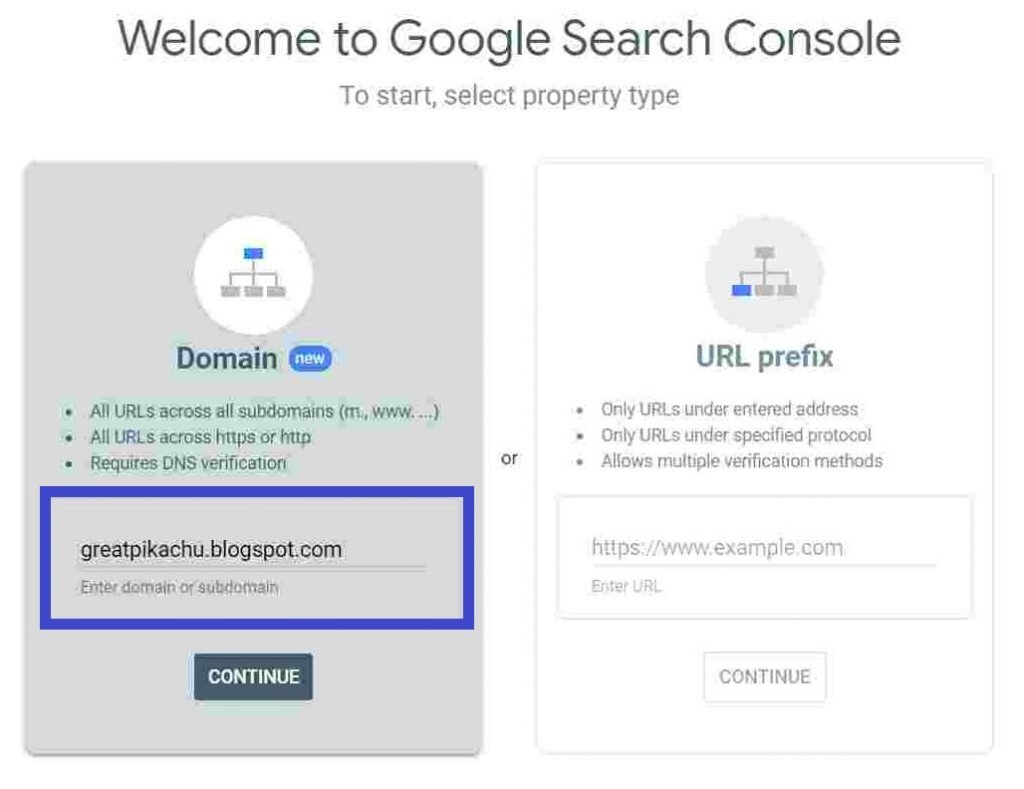
First of all, open your Blogger account, and proceed to Settings – Search Appearances – Click on Edit for Google Search console.
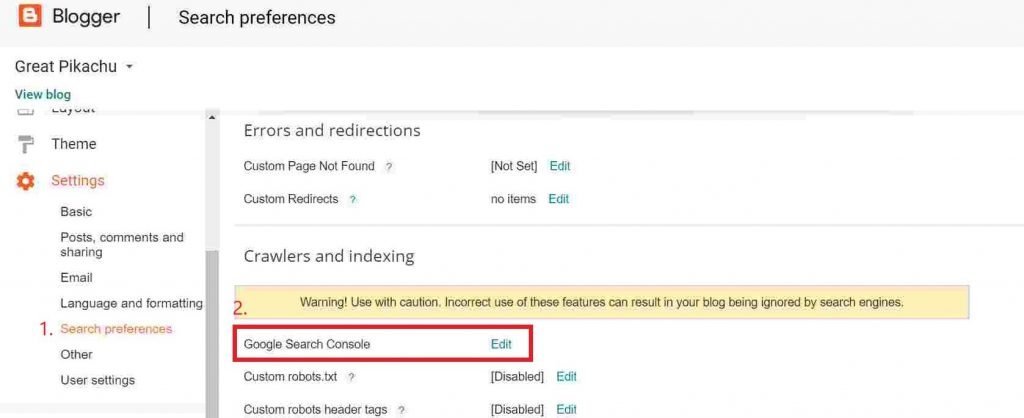
After you’ve clicked on Edit, you will be redirected to GSC for adding your Blog URL. Only enter your Blog URL and click Continue.
For eg. look at the given below image.
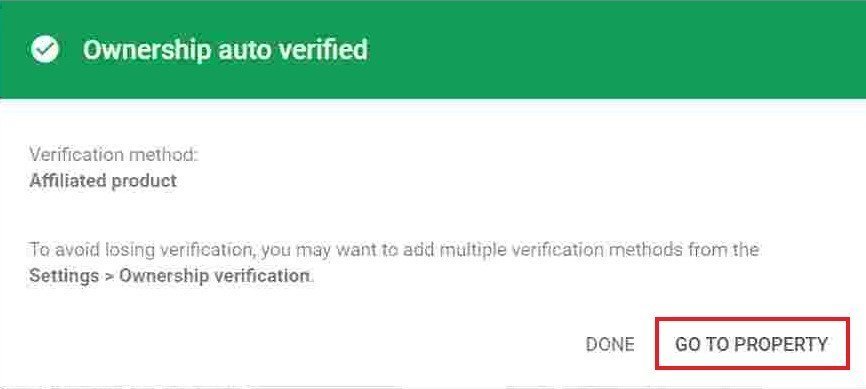
Now, you’ll see a Popup saying ‘Ownership Auto verified‘. That’s a blessing for bloggers who create their blog through Blogger. Because Blogger and GSC both are a part of Google and they made it very fast to verify it.
After google verifies your blog click on ‘Go to Property.
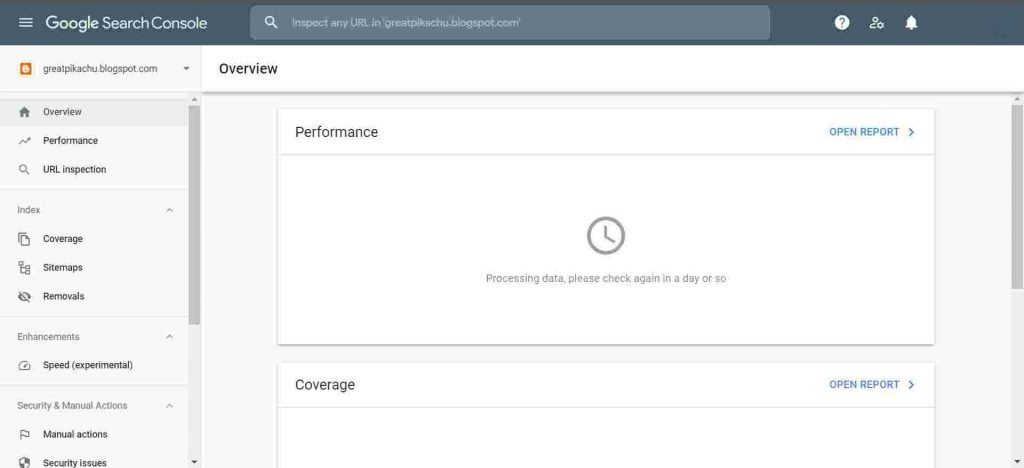
Now you’ll be seeing a homepage of GSC, somewhat like this.
Now, as you have previously written your blog post, just open your blog post and observe the URL of your blog post. Have a look at your Blog post URL from the given image.
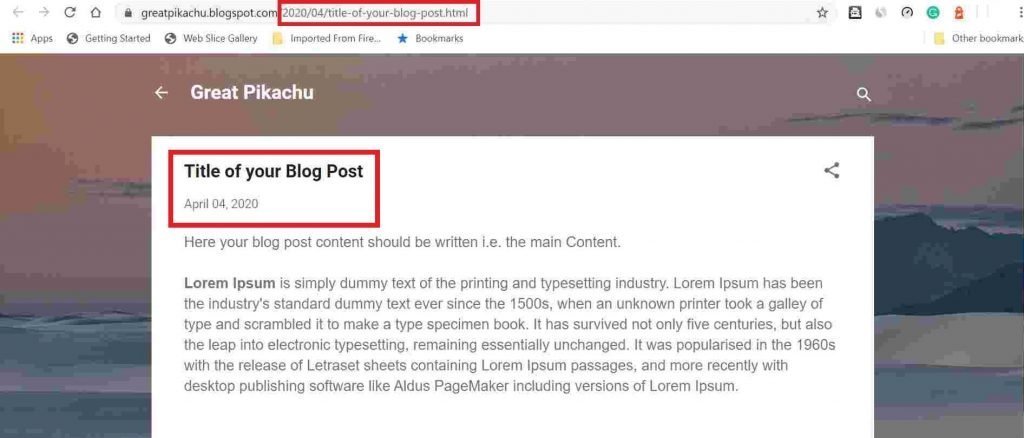
As you can see, the URL contains Two formats:
1. Year and Month of your published post. (2020/04)
2. The title of your post (Title of your post)
This is how the URL is created for your blog post.
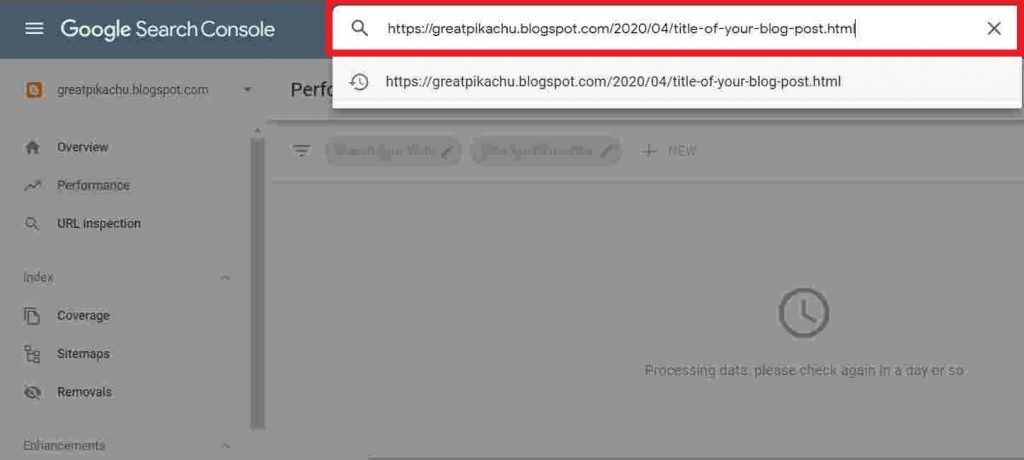
Now, you have to Copy your blog post URL and go to the Search Console and click on URL Inspection.
As soon as you click on URL Inspection you will see a dropdown from the top asking for the URL of your blog post.
Paste your blog post link in that drop-down, somewhat like this.
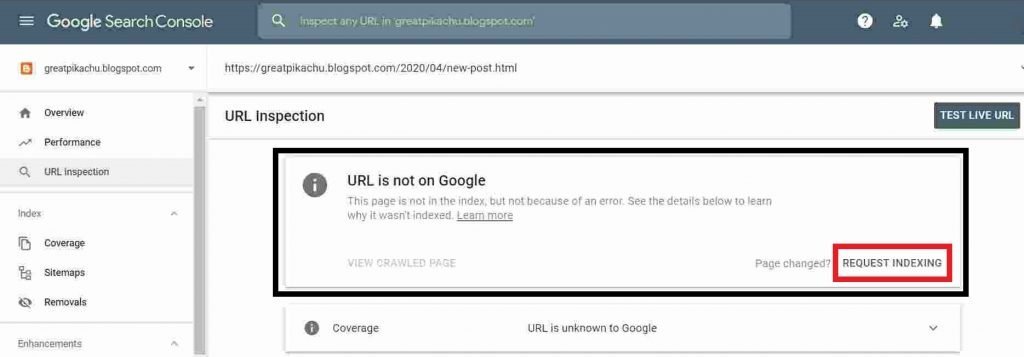
Now press Enter, it will show the loading of ‘Retrieving data from Google Index’. Let it load and it will show ‘URL is not on google‘. Don’t worry.
You just have to click on Request Indexing on the right.
Now, you might be thinking that “Hey harish, as you told that search console and Blogger is from google only, so why my blog post URL is not on google, it should be right?”
Well, the answer is, though the GSC and blogger are from google. But Google is a huge company handling lots of blogs similar to yours.
So whenever you are changing, editing, or uploading a new blog post you should be informing google through the search console. That’s the only way you can inform Google, “Hey, my new post up, check and index it for ranking”.
So, back to steps…
After clicking on request indexing wait for a minute or two to let google test your live blog post URL.
In a minute you’ll see a pop-up like this.
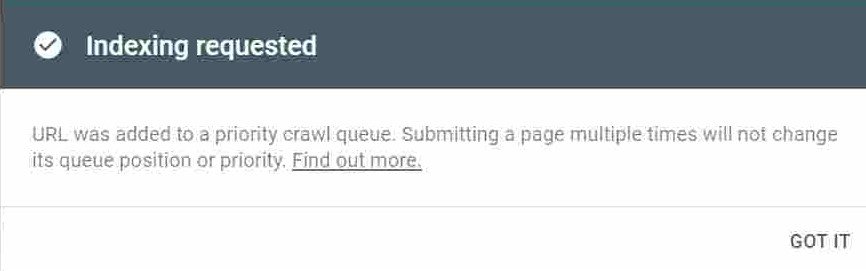
As google showing indexing requested it means your blog post URL is now on google. If you want to re-check whether things are right or not?
Then, you follow the same process of Pasting your blog post URL in the search console’s URL inspection and press ENTER.
Search console will show you ‘URL is on google’.

Yay! So finally you got peace of mind that your blog post URL is on google.
After this Google will review your submitted blog post considering the relevancy of your content related to your niche and grammatical mistakes and lots of algorithms.
Most Important Note:
Whenever you Edit your existing article from your blog or publish your new blog post, make sure you submit your post’s URL in GSCs drop–down in URL inspection to request indexing again.
Also, make sure to keep track of Google Analytics and the Search console as they provide valuable insights about your site. They’ll also let you know the threat detected on your site and help you to solve it.
If you want to learn more in-depth about Google Analytics you can learn Analytics courses by visiting here.
From now onwards it’s your duty/goal to write and publish content related to your niche and share your blog post as much as you can to your family and friends to bring traffic to your blog. And Blogging is always a consistent process.
Conclusion:
So, that’s all for this FREE Blogging guide.
I hope you enjoyed setting up your own blog.
Congratulations! You finally set up your own Blog that too for FREE.
Feeling proud? You should be!
If I made your day, share this article with your friends and family to let them start their own blog 😉
Signup for My Weekly Newsletter to stay updated in Blogging and Digital Marketing 🙂
Actionable Tips about Digital Marketing from Harish 😉
Get Rich Resources, Tips & Strategies about Digital Marketing straight into your Inbox. Subscribe. It'll just take few seconds 🙂
Thank you!